Note
Go to the end to download the full example code
Create/View a Netlist with Vivado
This example walks through the process of creating and viewing a netlist within Vivado.
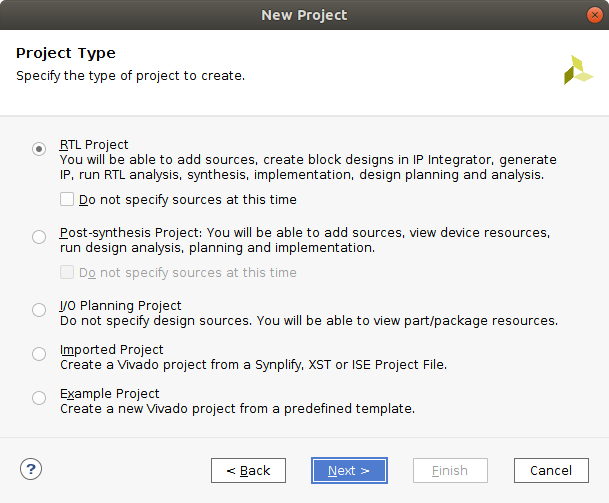
The first step is to choose what kind of project you want to create. If you already have a netlist, choose “Post-synthesis” project. Within a “Post-synthesis” project, you can add a netlist source such as an EDIF file. Look in the spydrnet/support_files/ folder to see netlists that you can add to a “post-synthesis” project to view for yourself. If you only have hardware description file(s) (Verliog, SystemVerilog, VHDL, etc.), then create an RTL project. “RTL” means register-transfer level, which essentially tells Vivado that you will be adding your own hardware description language sources such as Verilog or VHDL for the design. This example shows how to run synthesis on an RTL project and open the netlist afterwards, but opening a netlist from a “Post-synthesis” project is done in practically the same way.
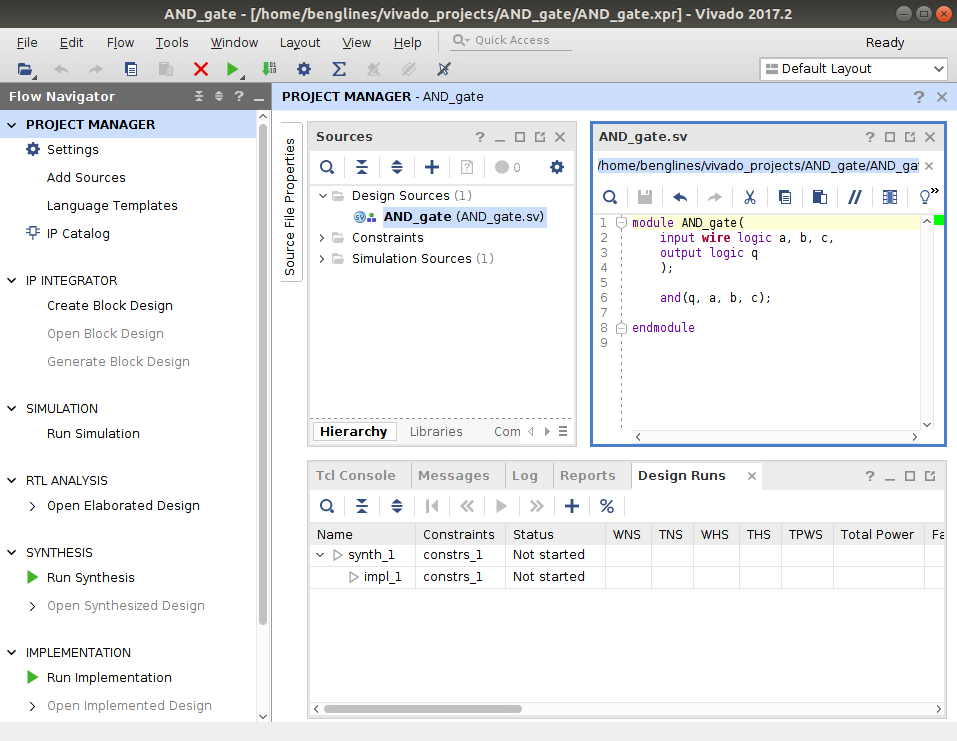
This example is of a simple 3-input AND gate module. Here, a SystemVerilog source was created, and the logic was implemented inside the .sv file. Below is a view of Vivado after the source has been created/added, as well as the source code.
module AND_gate(
    input wire logic a, b, c,
    output logic q
);

    and(q, a, b, c);

endmodule
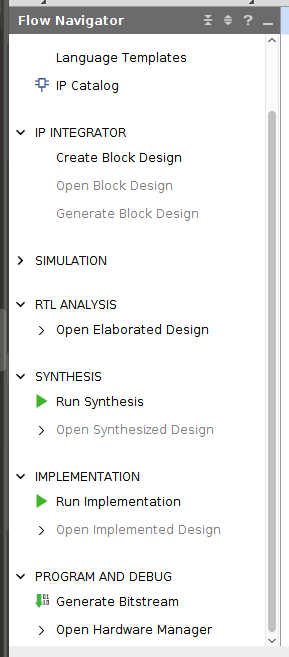
After adding/creating any source files for your project, go to the “Flow Navigator” window on the left hand side of the screen, and click on “Run Synthesis.” If you’re in a post-synthesis project, you don’t need to run synthesis, since you should already have a netlist ready to go.
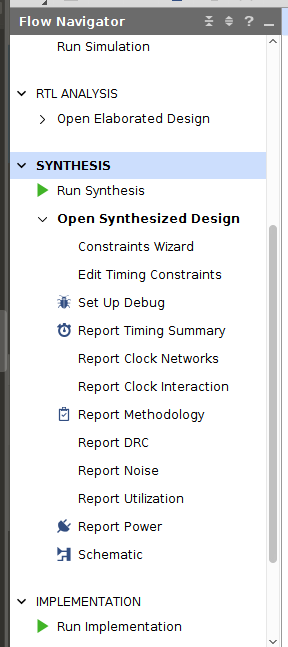
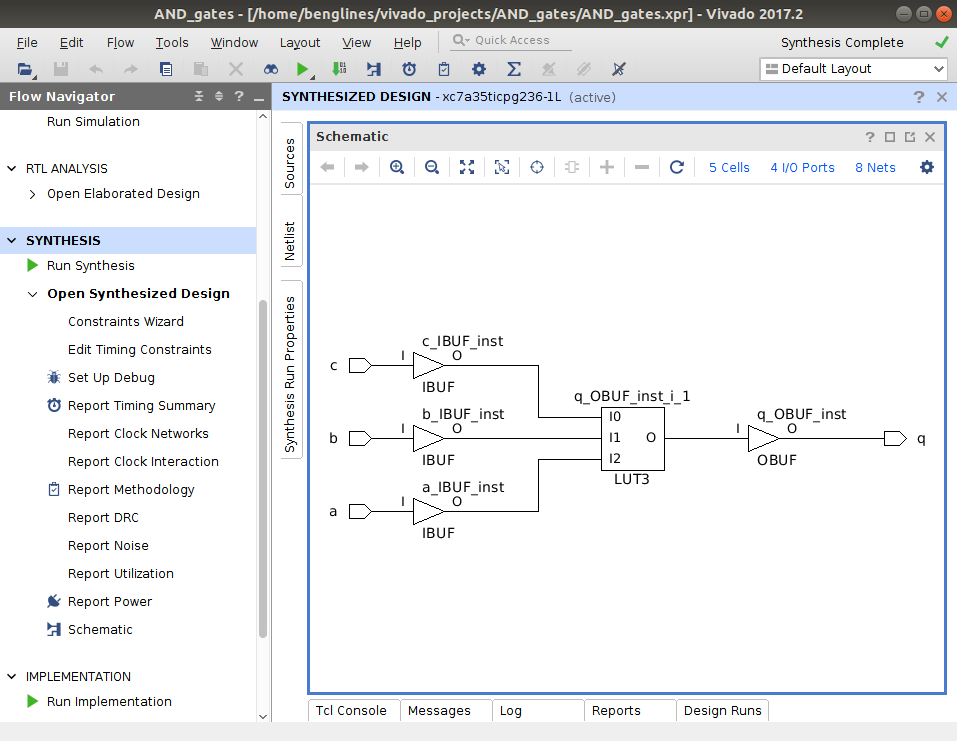
Once synthesis has been run, you are ready to open up the netlist schematic in the synthesized design. Expand the “Open Synthesized Design” tab under the “Synthesis” section, and click on the “Schematic” option. If you’re in a post-synthesis project, the “Open Synthesized Design” tab should be under the “Netlist Analysis” section of the “Flow Navigator” window. By default, it will open up a view for the device, but to see the netlist, you should see that another tab was opened in the main window called “Schematic.”
Now you can see the netlist for yourself! This gives you a way to easily visualize what the netlist is, and to be able to interact with it.
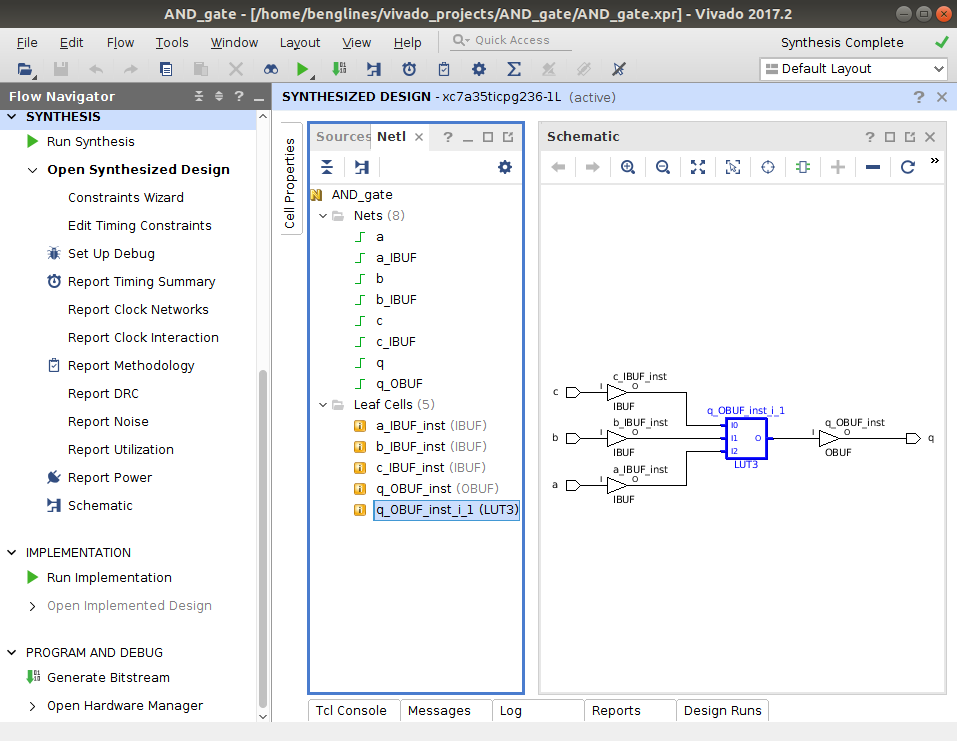
To further interact with the netlist schematic, try clicking on the “Netlist” tab next to the “Schematic” window. A menu should popup with all the “Nets” and “Leaf Cells.” Expand the menu and click on each of the lines. As you do so, you’ll see each element be highlighted in the “Schematic” viewer.
Total running time of the script: (0 minutes 0.000 seconds)